DIY: How to Build a Simple Rolling Planter
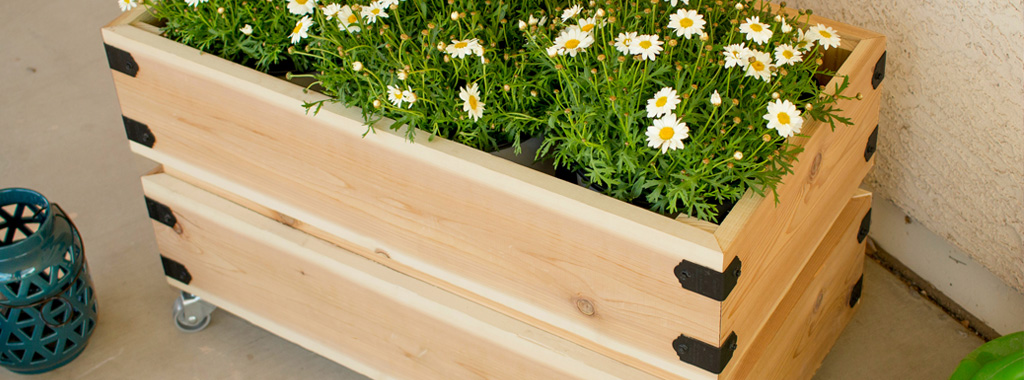
Looking for a simple way to dress up your patio? Elisha Albretsen from Pneumatic Addict has teamed up with Simpson Strong-Tie to bring you this simple DIY rolling planter using Outdoor Accents® decorative hardware.
Spring and summer arrive quickly in central Arizona. Currently, we’re enjoying –70° temperatures while bragging to our East Coast friends, but in a couple of months the rest of the country will be the ones laughing. Triple digits are right around the corner, so that means I’ve got to take advantage of the nice weather while I can.
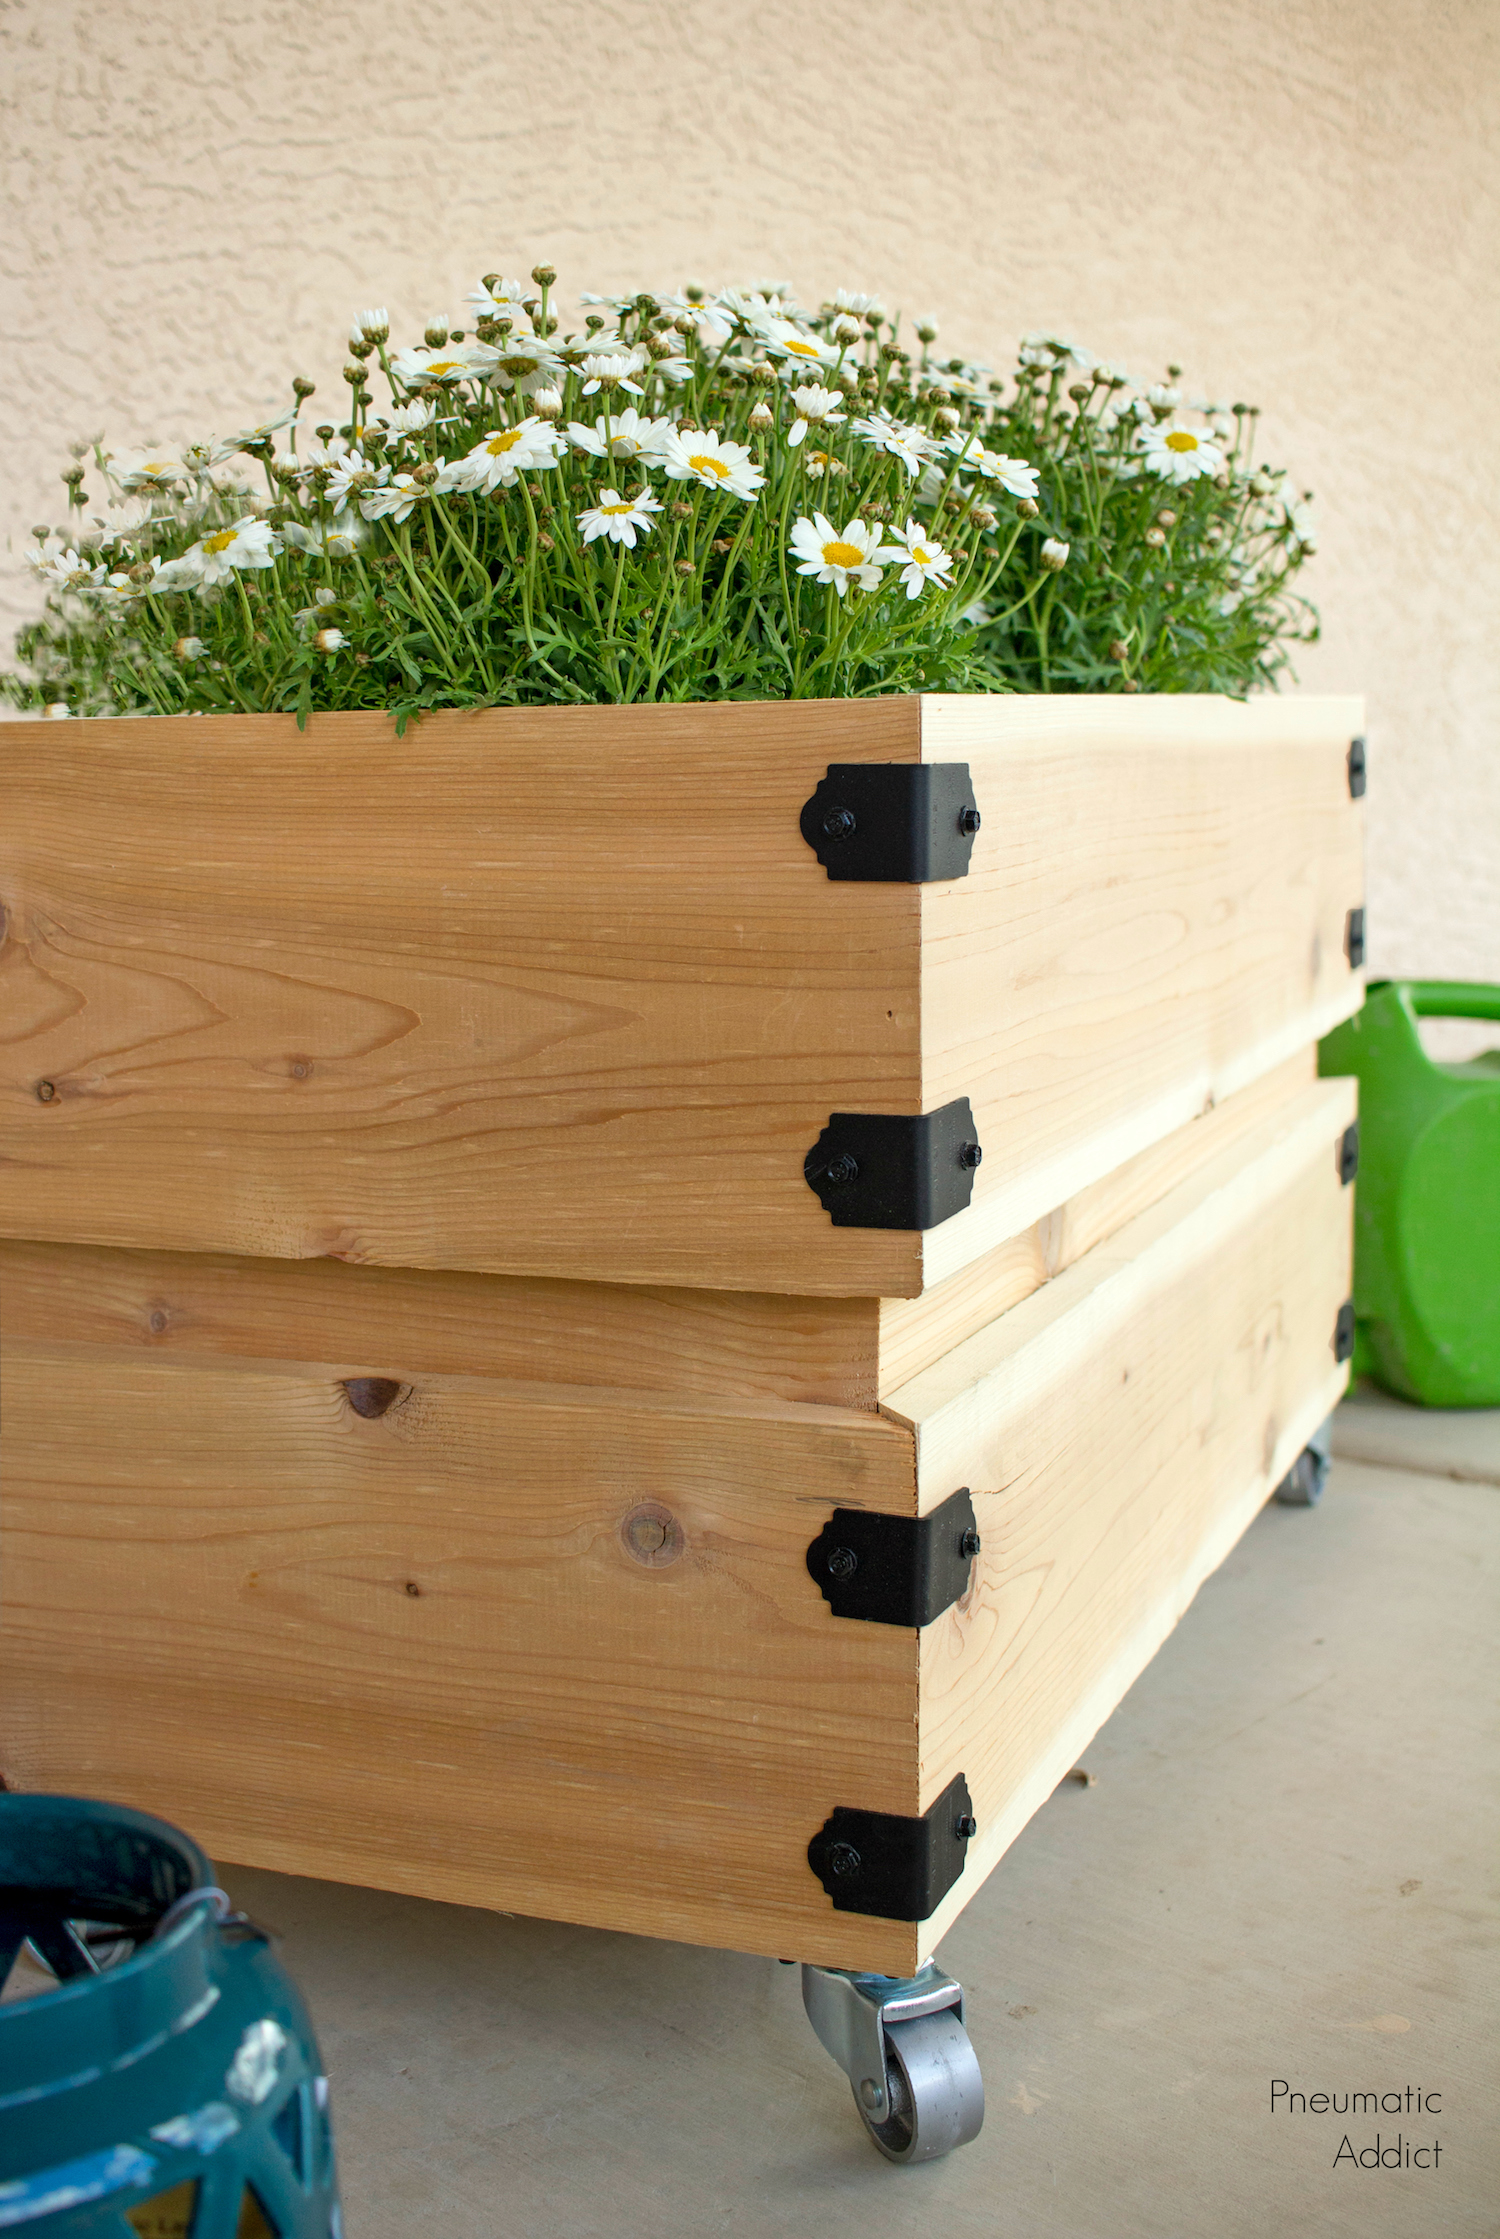
The Southwest has famously long growing seasons. So that means I get a head start on all my outdoor projects. I’m still so enthralled with the glass-topped outdoor table I built last year that I decided to build it a friend. I built a handy, rolling planter and was able to incorporate more of the gorgeous black hardware from the Simpson Strong-Tie® Outdoor Accents® line.
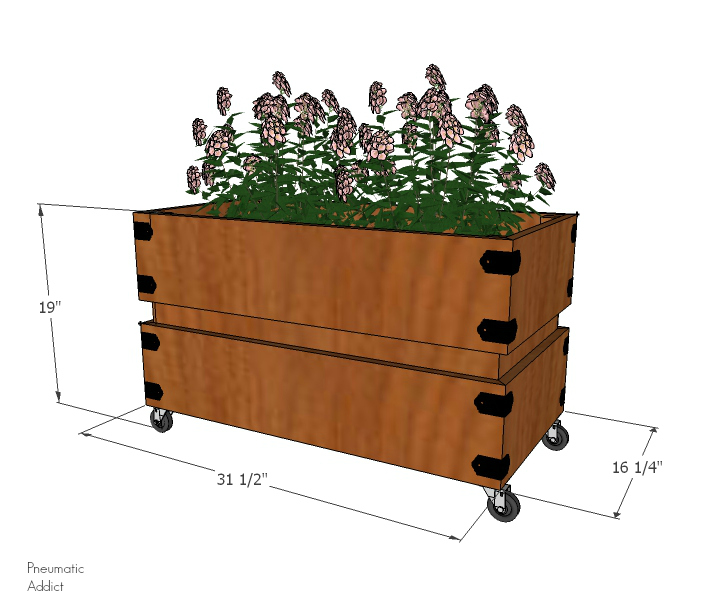
Whenever you’re planning an outdoor project, you want to make sure you use a moisture-resistant material like cedar, redwood or pressure-treated fir. I used cedar to construct my new rolling planter, and it worked like a dream. I was able to build the whole thing in just a couple of hours. Materials List:
-
(1) 2×2 x 96″ board
-
(4) 1×8 x 96″ board
-
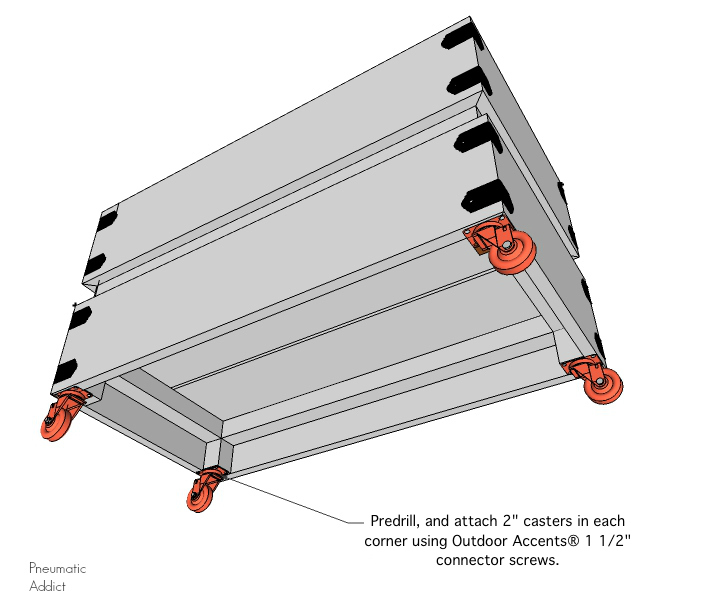
(4) 2″ casters
-
(16) Outdoor Accents® APA21 angles
-
(32) Outdoor Accents® 1 1/2″ connector screws
-
(8) 2 1/2″ Deck-Drive™ DSV Wood screws for exterior use
-
(12) 1 1/4″ Deck-Drive™ DSV Wood screws for exterior use
-
1 1/4″ finish nails or brads
Tools Needed:
-
3/16″ hex bit
-
T25 torque bit
-
5/32″ drill bit
-
Miter saw
-
Brad nailer or hammer
-
Speed square
-
Power drill
-
Tape measure
-
Pencil
-
Safety glasses
-
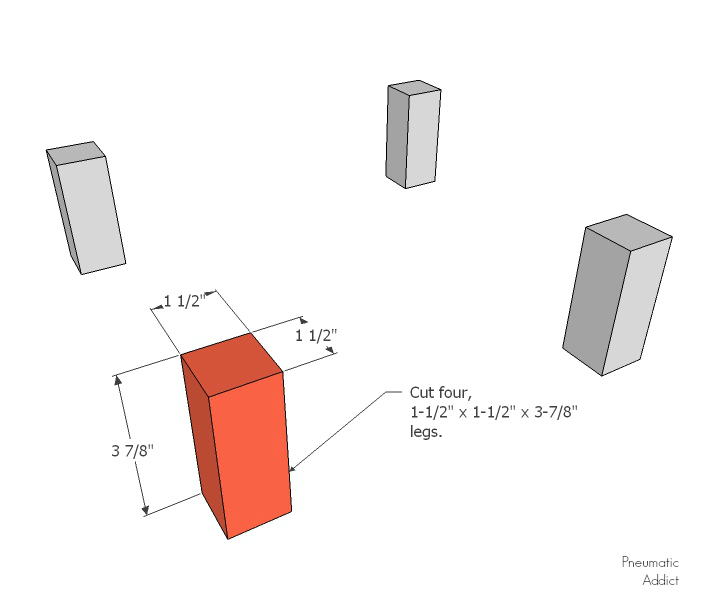
Starting with the 2×2 x 96″ board, cut four 1 1/2″ x 1 1/2″ x 3 7/8″ legs.
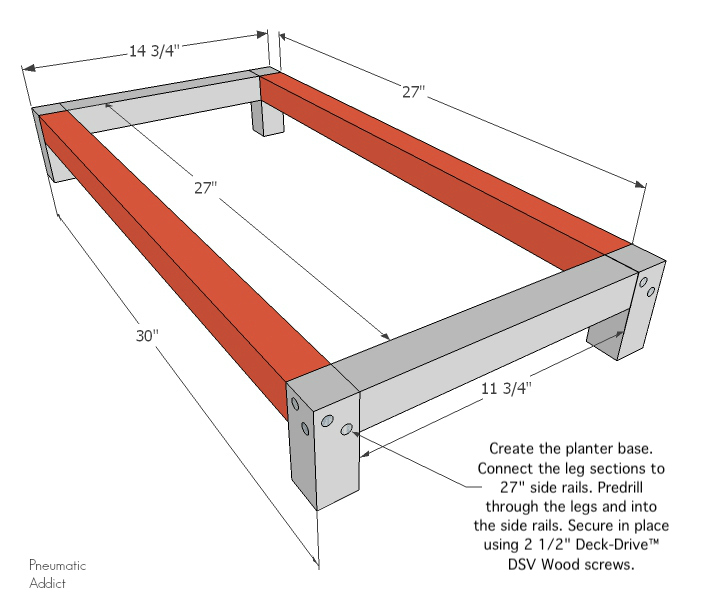
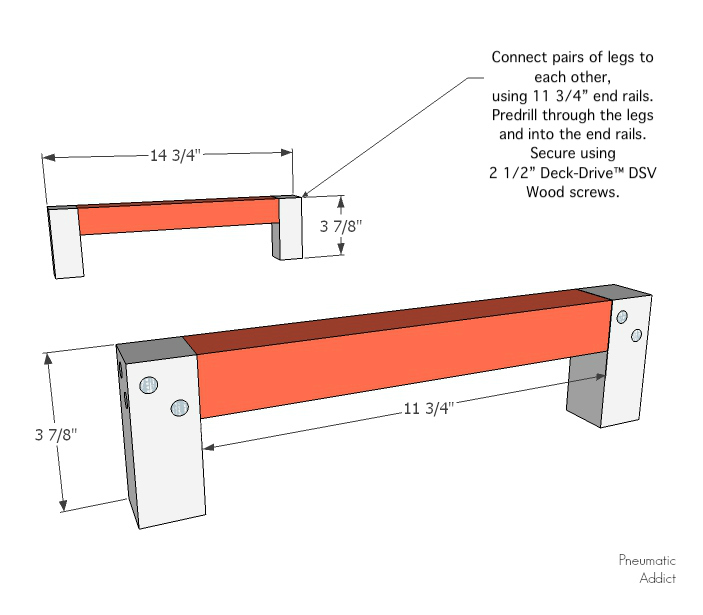 3. Create the planter base. Connect the leg sections to 27″ side rails. Predrill through the legs and into the side rails. Secure in place using 2 1/2″ Deck-Drive™ DSV Wood screws.